Making a fence gate that lasts
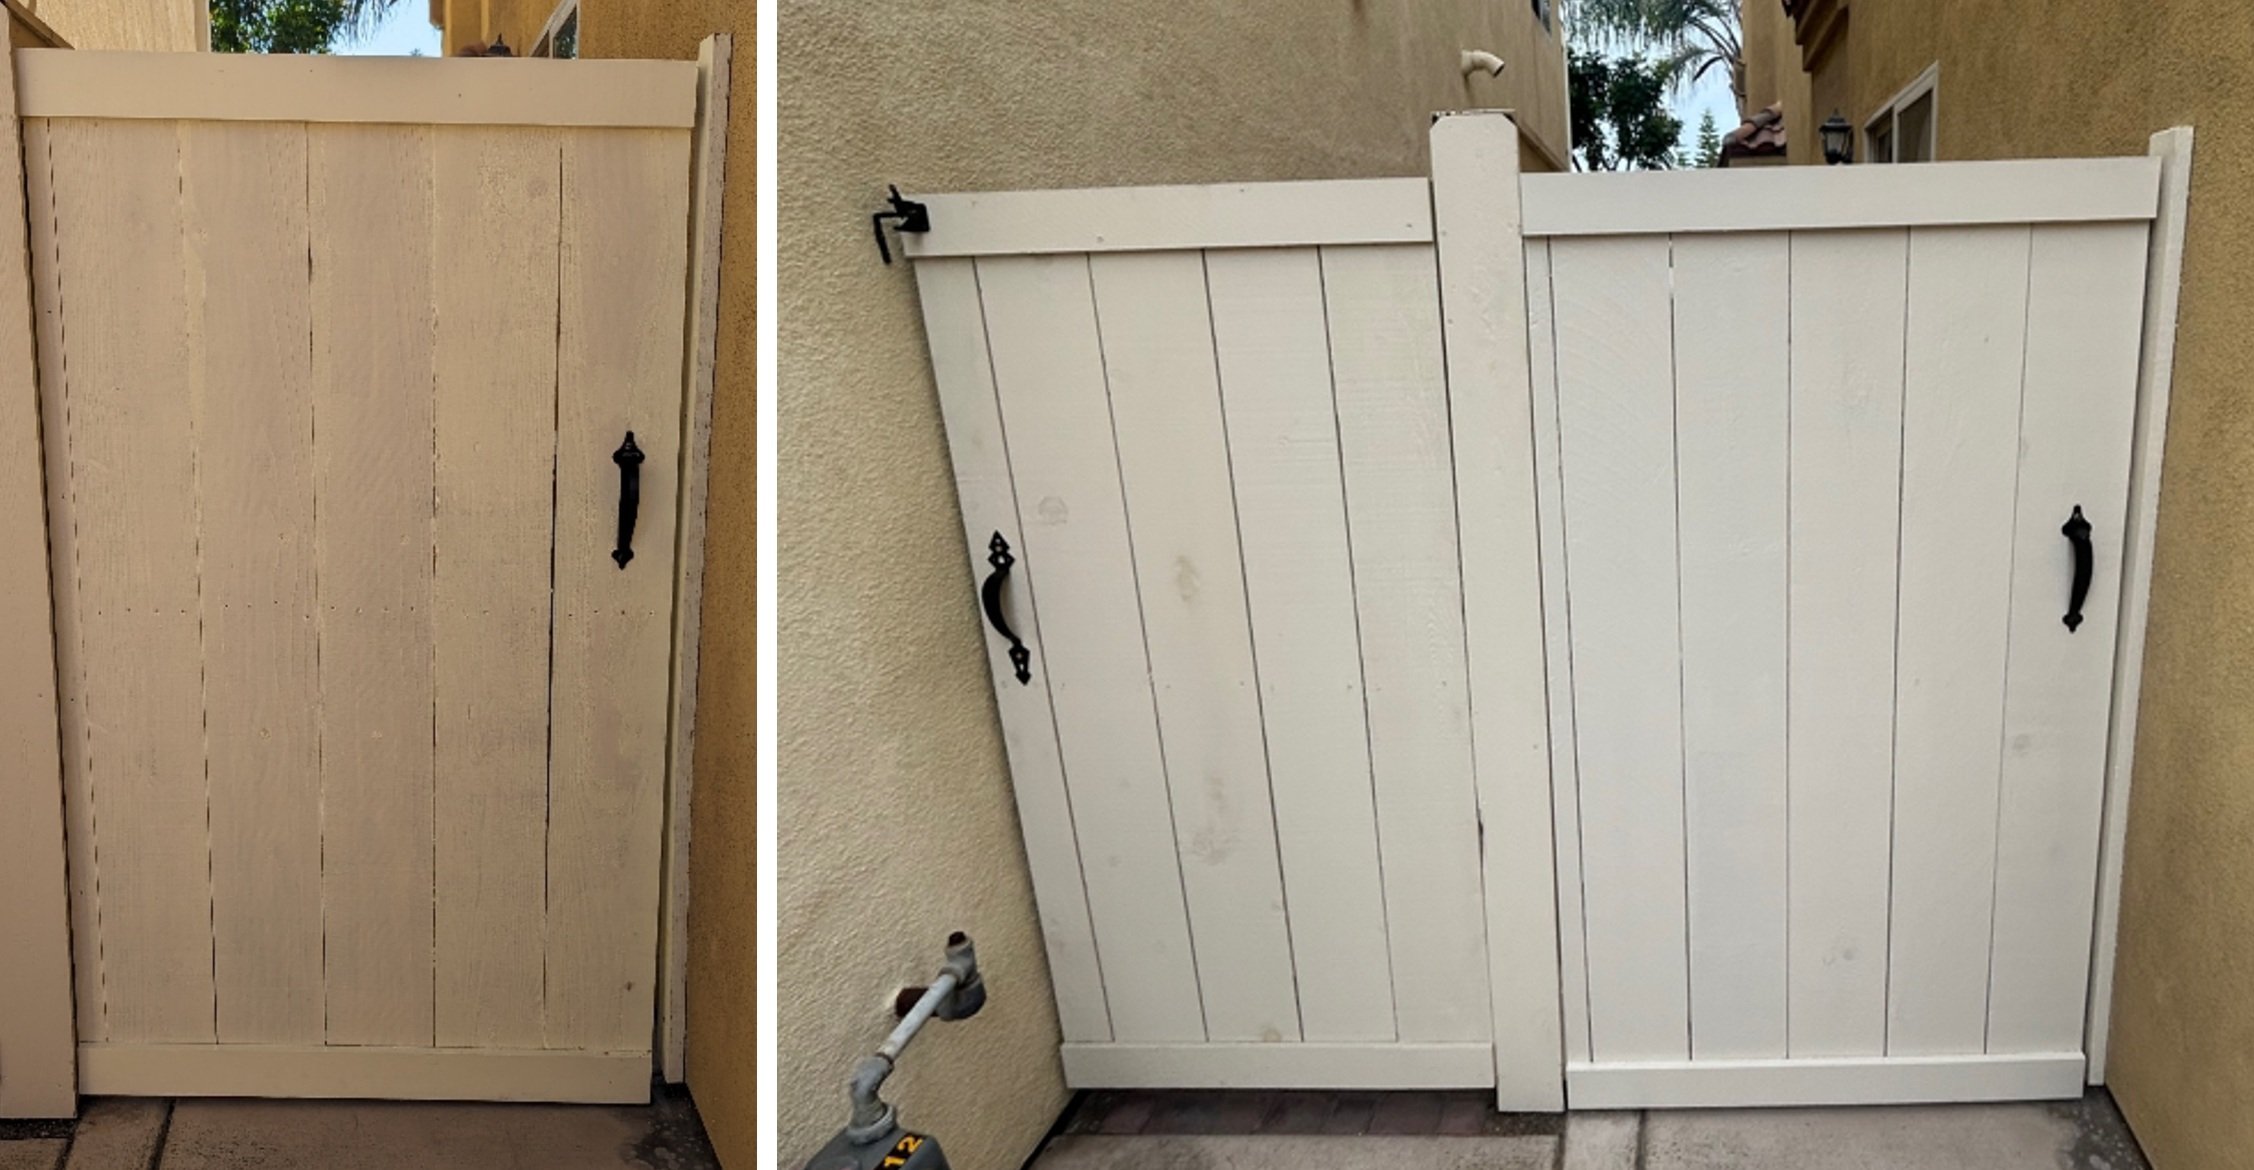
The left side was a poorly made gate by an unlicensed handyman. Looks like crap! The one on the right we rebuilt, repainted, and rebalanced.
How to Build a Fence Gate on an Existing Post – The Right Way
A fence gate is a critical component of any fence, providing both security and ease of access. But when installing a fence gate on an existing post, you need to ensure it’s sturdy, level, and built to last. At HUGE Handyman, we’ve seen gates done the right way—and the wrong way. If you want a smooth-swinging, properly aligned, and durable gate, follow these key steps to get it right the first time.
1. Start with a Strong, Sturdy Post
Before attaching a gate to an existing post, inspect its strength. A weak or rotting post won’t support the gate’s weight, leading to sagging or misalignment. If the post wiggles or leans, replace it so all that hard work doesn’t go to waste
2. Use Quality, Pre-Painted Materials
One common mistake is installing a gate and then painting it. This leads to exposed, unsealed wood that absorbs moisture, causing warping and rot. Instead:
Paint or stain all wood pieces before assembly
Use rust-resistant screws and hinges
Seal cut edges to prevent water infiltration
Painting everything beforehand ensures long-lasting durability and a polished final look.
3. Measure and Frame the Gate Properly
A well-built gate starts with an accurate frame. Measure the opening carefully, subtracting about ½ to ¾ inch for clearance on both sides. Use pressure-treated wood or metal frames for durability.
Cut and assemble the frame using strong joinery (e.g., lap joints, pocket screws, or welded corners)
Double-check squareness using diagonal measurements
If the frame isn’t perfectly square, the gate won’t swing properly.
4. Choose the Right Hinges and Attach Securely
Your hinges need to be strong enough to handle the gate’s weight and movement. We recommend:
Use a gate kit - They are powder coated and help keep the gate from sagging over time like this one
At least three hinges for taller or heavier gates
Securing hinges deep into the post using long, corrosion-resistant screws
Proper hinge placement ensures smooth opening and closing without binding.
5. Ensure the Gate Swings Level
A gate that drags or swings unevenly is frustrating and wears out quickly. To guarantee level movement:
Use a level when positioning the gate
Shim or adjust hinge placement to compensate for any misalignment
Check swing clearance to avoid scraping against the ground
Taking the time to level the gate prevents future issues and ensures effortless operation.
6. Install a Reliable Latch for a Smooth Close
A poorly aligned latch makes a gate difficult to close and secure. To get it right:
Align the latch precisely with the gate’s frame
Use adjustable latches to compensate for seasonal wood expansion
Test multiple times to ensure smooth locking
The goal is a gate that latches effortlessly without force.
7. Final Touches: Test, Adjust, and Maintain
Once your gate is installed, don’t forget the final checks:
Open and close it multiple times to test swing and latch
Tighten any loose screws and apply extra sealant if needed
Periodically recheck level and re-tighten hardware over time
Proper maintenance ensures your gate stays functional and secure for years to come.
The Right Way vs. The Wrong Way
A properly installed gate should: ✅ Swing smoothly without resistance ✅ Latch securely without force ✅ Remain level over time ✅ Be sealed and painted for durability
A poorly installed gate will: ❌ Sag or drag on the ground ❌ Have an uneven swing or loose latch ❌ Warp due to exposure and lack of sealing
By following these steps, you ensure your fence gate is built to last and functions flawlessly. At HUGE Handyman, we specialize in getting projects done the right way, saving you time, frustration, and costly repairs down the road.
Need help with your fence gate installation? Contact HUGE Handyman today for expert service in San Diego County!