What's Involved in Popcorn Ceiling Removal
There's More to it Than What You Think
We get asked to remove popcorn ceilings at least once a week but most the time the homeowner doesn't realize what's involved. There are a lot of steps to consider, and if you get some random drywaller from Craiglist to do it, you could be opening pandora's box in your living space. These are the steps necessary to do a job like this perfectly.
Step 1: Verify There Is No Asbestos
Before beginning any popcorn ceiling removal, it is crucial to test for asbestos. Homes built before 1980 may contain asbestos in the ceiling texture, which is hazardous when disturbed.
Purchase an asbestos test kit or hire a professional to take a sample.
If asbestos is present, do not attempt to remove the ceiling yourself—this requires a licensed professional for safe removal.
If the test is negative, let's go to the next step
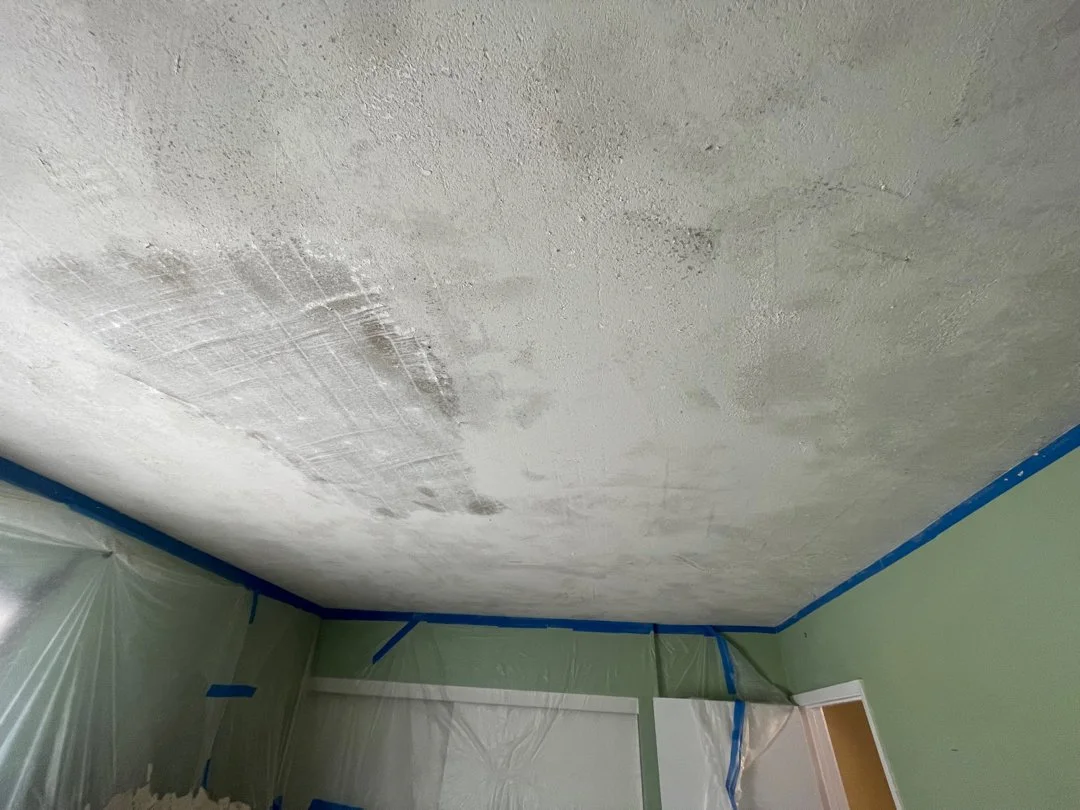
Step 2: Protect the Floors and Walls

Removing popcorn ceilings is messy, and preparation is key to keeping the rest of your home clean.
Cover floors with thick plastic sheeting or drop cloths to prevent damage.
Use painter’s plastic or tarps to cover walls, windows, and any exposed furniture.
Remove light fixtures or cover them securely with plastic wrap.
Wear a dust mask, safety goggles, and protective clothing to avoid inhaling debris.
Step 3: Determine If Your Ceiling Is Plaster
Not all popcorn ceilings are made of drywall. If your ceiling is plaster, it requires a different approach to ensure smooth results.
Plaster ceilings absorb moisture differently, making traditional water-based scraping ineffective. You won't be able to use a fancy drywall sander either because it will be too rough for the paper.
Instead of soaking the ceiling, apply a bonding primer to create a solid base for the skim coat.
At HUGE Handyman, we use Drylock, a high-quality primer that prepares the surface for the next steps.
Step 4: Apply the First Coat of Skim Coat

Once the ceiling is prepped, it’s time to apply a skim coat to create a smooth finish.
We recommend using a softer, pre-mixed drywall topper rather than standard joint compound.
Use a 12-inch drywall knife to apply a thin, even layer across the entire ceiling.
Allow this first coat to dry completely before proceeding.
Step 5: Sanding and Second Coat
After the first skim coat has dried, it’s time to refine the surface.
Lightly sand the ceiling with 220-grit sandpaper to smooth out imperfections.
Apply a second skim coat to cover any remaining rough spots.
Let the second coat dry completely and sand once more for a polished, even surface.
Step 6: Prime the Ceiling
Before painting, priming the ceiling is essential to ensure even paint coverage and long-lasting results.
Use a high-quality primer designed for ceilings, preferably one with stain-blocking properties.
Apply with a roller on an extension pole for even coverage.
Allow the primer to dry thoroughly before moving on to paint.
Step 7: Paint the Ceiling and Walls
The final step in transforming your ceiling is painting.
Use a flat or matte white ceiling paint to give a clean, modern look.
Keep in mind that removing popcorn texture lowers the ceiling by about half an inch, exposing an unpainted edge on the walls.
If the wall paint is old or faded, we recommend repainting the entire wall for a seamless finish.
Final Thoughts: A Fresh, Modern Ceiling with Minimal Impact
Popcorn ceiling removal can be a messy job, but with proper preparation and professional techniques, you can achieve a smooth, modern finish that instantly updates your home. At HUGE Handyman in San Diego, we take care of the entire process, from protecting your space to delivering a flawless result.
Want to refresh your ceilings without the hassle? Contact us today for a free estimate and let our experienced team handle the job with minimal disruption to your home!
Ready for a Ceiling Makeover?
📞 Call us at 858-800-4843 or visit our website to schedule your popcorn ceiling removal today!